
The internet speed matters the most when you surf the web. But the slow internet speed really spoils our surfing experience. Literally, everybody wants to know how to increase net speed on windows operating system so that they can enjoy the full bandwidth provided by the Internet service provider. So follow the steps provided in the post to remove the default cap know as reserve bandwidth and enjoy the fast internet speed.
In this first changing world the slow internet speed is really like a curse and one of the most frustrating things to deal. When the technology gets so many improvements, then the fast internet speed is now a day matter the most. Everyone wants little more when it comes to internet speed. So users always try to find the method and ways to speed up their internet.
Fast internet speed allows us to download big files in quick time so reduce the chances of link breaks. So in this post, we tell you a reliable tweak which effectively increases your internet speed and provide you better web surfing experience.
1-Editing Registry

How To Increase net Speed On Windows
1- First, open the Run Console by pressing “Windows + r” on the keyboard. Then type “regedit.” Press Enter to open the Registry Editor for Windows.
Navigating to Current Version
How To Increase net Speed On Windows
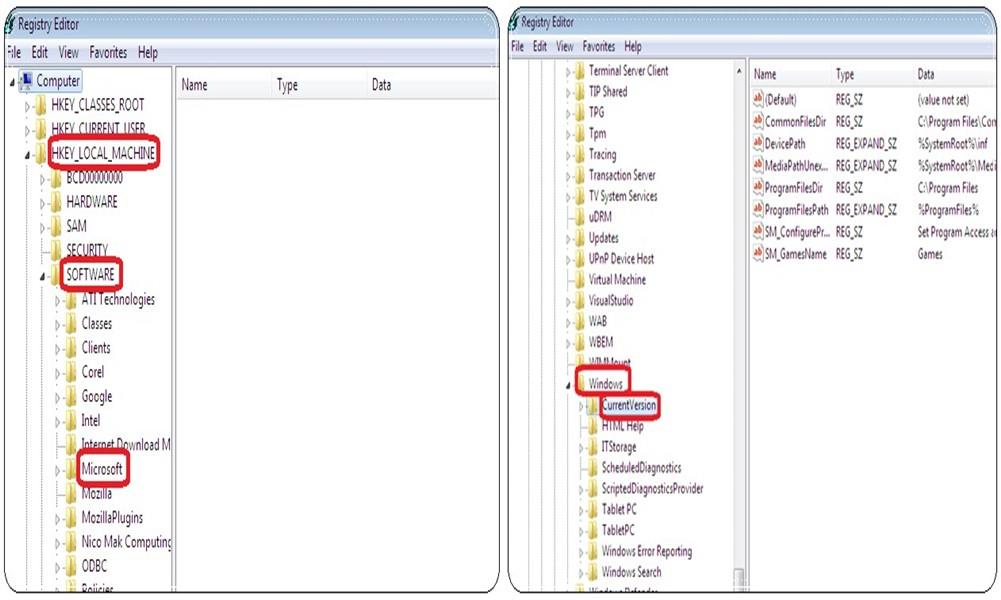
Now click on “Hkey_Local_Machine” and follow the below steps;
A- Find “software” and then click it.
B- Find “Microsoft” in the software and click it.
C- Find “windows” in Microsoft and click it.
D- At the top of the list, you find “CurrentVersion” just double click it.
Increase Internet Download Manager Speed
Creating DWORD-32 Value
How To Increase net Speed On Windows
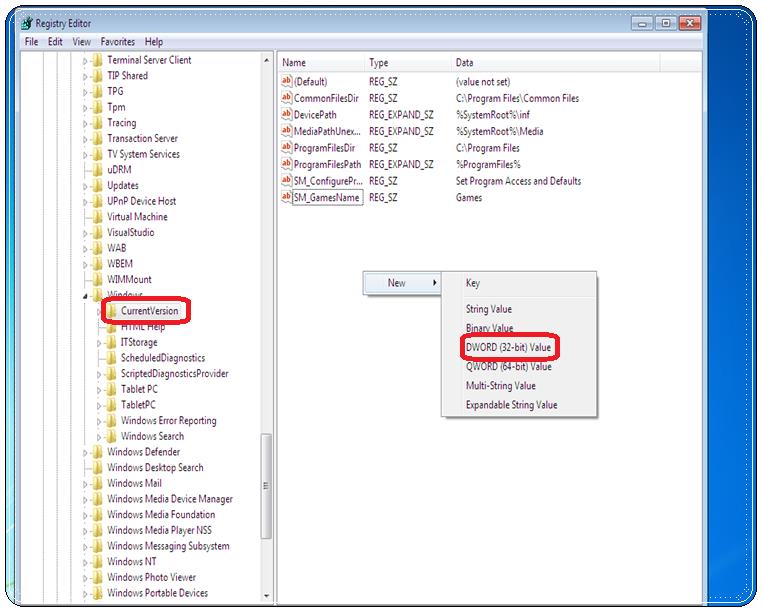
Now go to right portion and right-click on the blank part of the window. Now hover on new and then choose “DWORD (32-bit) Value”.
Creating First DWORD-32 Value
How To Increase net Speed On Windows
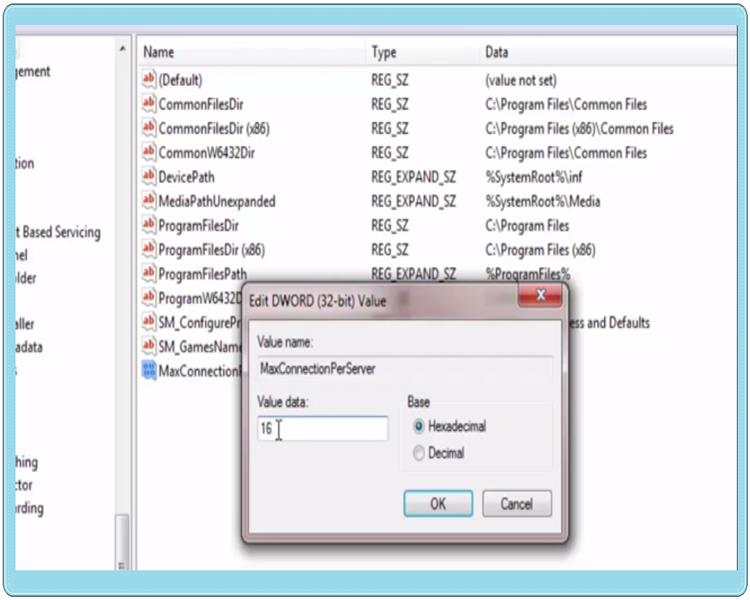
so what we do here is create a new registry name this registry as “MaxConnectionPerServer.” Now note that every word we start with a capital letter, and there is no space in between.After that right click on a newly created registry and select “Modify” and now on the right side of the newly opened tab select “hexadecimal,” and to the left side you have to enter a value of “16” and click OK.
Creating Second DWORD-32 Value
How To Increase net Speed On Windows
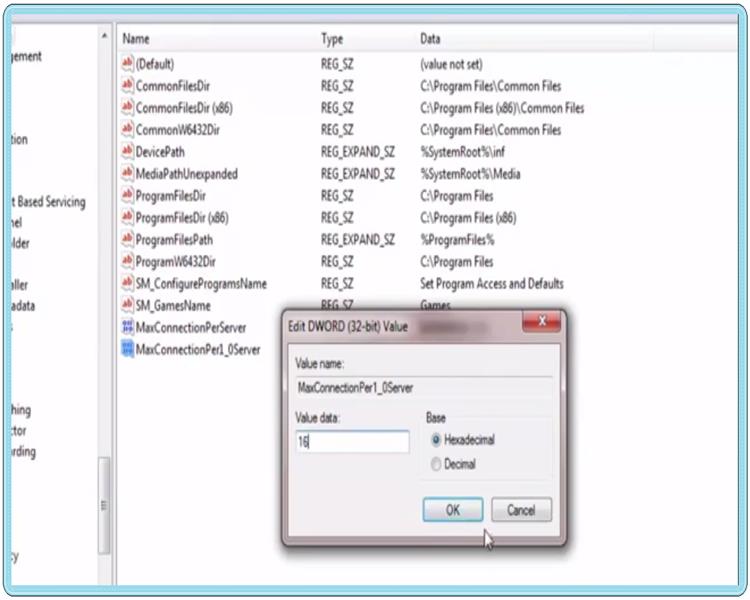
Now we create another registry using the same method. We have a Click the right mouse button on the current window and select another “DWORD (32-bit) Value”. Name the registry as a “MaxConnectionPer1_0Server” and right-click on it and select “modify” change to “16” again the same thing click OK so we are done with the first tweak.
2-Editing Group Policy

How To Increase net Speed On Windows
In the second optimisation, we will reopen the Run Console by pressing “windows+r.”. Now this time we enter “GPedit.msc” on the run console and press enter.
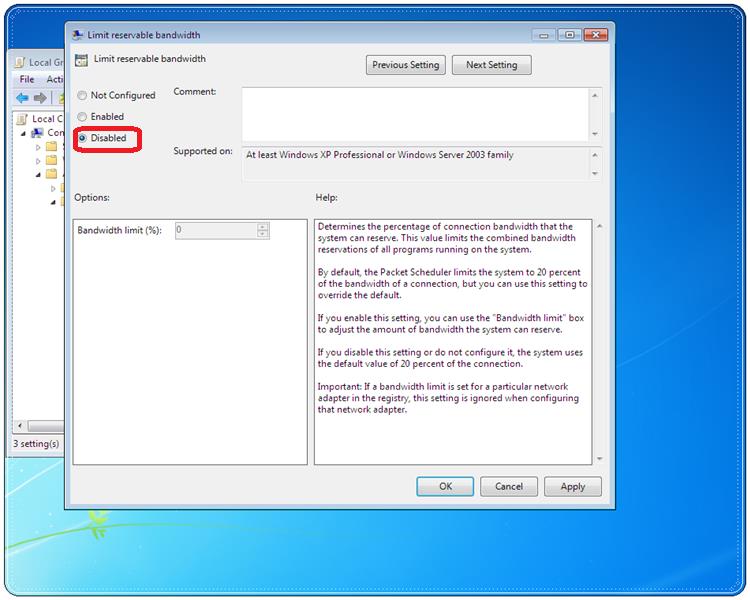
Disabeling Reservable Bandwidth

How To Increase net Speed On Windows
Then go to “Administrative Templates” under Administrative Templates we now open “Network”. After opening the “Network” select “QoS Packet Scheduler” and open it. Now on the left select the “limit reservable bandwidth” option.
Most Visited Top 10 Best Websites In The World
How To Increase net Speed On Windows
Double click the limit Reservable bandwidth and a new window open up. Now select the option “disabled” and hit ok. What we are doing here we deactivate a bandwidth limit which is default reserved by the entire computer.
3- Disabeling Global Autotuning
How To Increase net Speed On Windows
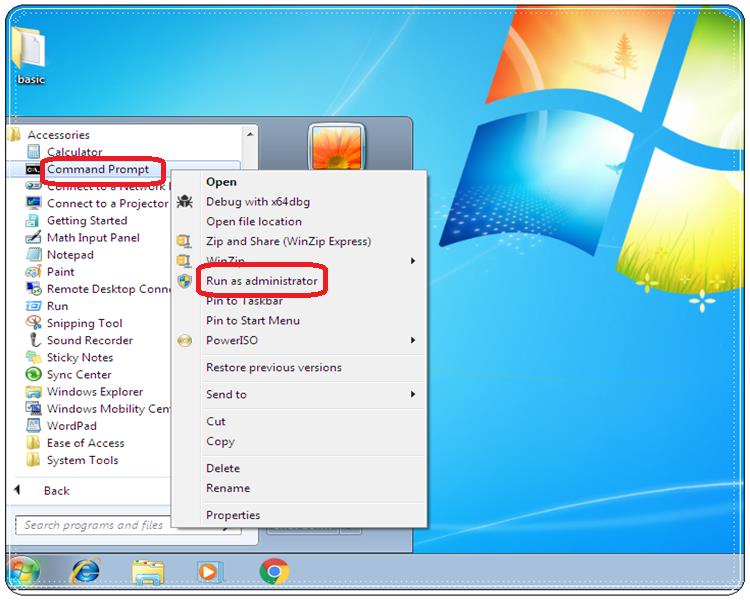
In the last tweak, we have to open the command prompt. Now, remember friends you have to open the command prompt as an administrative mode. To open cmd prompt in administrator mode
1-first you have to click on start and then all programs.
2- Now go to Accessories and right-click on the command prompt and run as administrator.
How To Increase net Speed On Windows
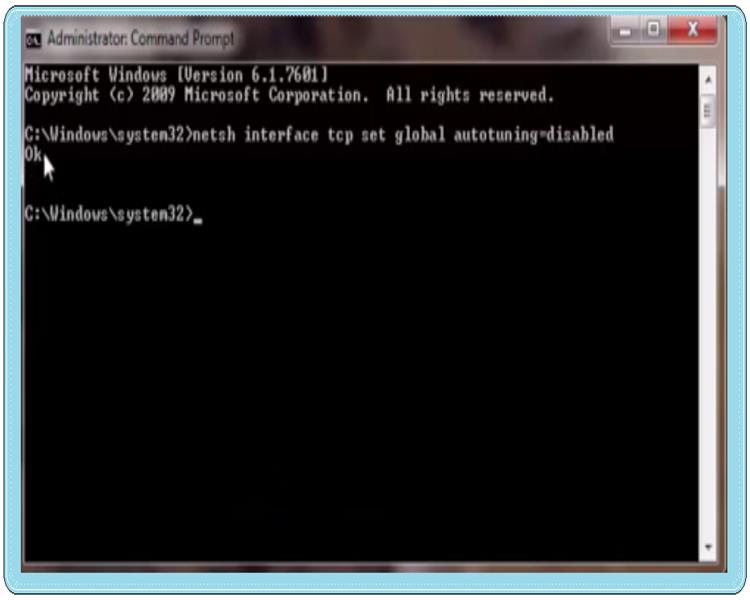
So when you open that particular prompt, what you need to do enters the following command
“netsh interface tcp set global autotuning = deactivated”
And hit Enter and you’ll get the okay message. In the command prompt now quit the command prompt and the first thing you need to do after leaving restart your computer, so it’s guys, hope these tweaks would work for you if your Any questions have it in the comments below and I would be happy to answer you take care.